
The wasabi most of us get at sushi restaurants, or from the store, isn’t wasabi. That green, slightly bitter powder is often made out of horseradish. In higher end restaurants, real, unprocessed wasabi is served, and prized for its fresh taste, lack of bitterness, and unique sharpness. It has the pungency of horseradish, but a definitively different bite and flavor.
My favorite Japanese restaurant has been offering real wasabi for years with a little somethin’ extra: pickled wasabi stem chopped and mixed into the wasabi paste. This is called kizami wasabi. It’s so delicious, it’s only the cost of the root that prohibits you from eating entire bowls of it.
Sometimes, you can buy wasabi root from online retailers or local Asian stores, but it’s usually only the root, without the leaves and stems. Such began my determination to grow it myself, in pursuit of the perfect wasabi condiment.
For years, I’ve been trying to figure out how to plant wasabi alongside running water in my yard. I tried it in the water feature outside, but it failed. I tried it in the shade under a tree, same thing. I was Googling hydroponic setups when I (luckily) stumbled across some very simple instructions: Just plant it in a self-watering pot and let it do its thing indoors.
How to Grow Wasabi Inside
I’m a full year in with my wasabi, and it has, in fact, been doing its thing with very little help from me. All three of my little plants shun the sunlight, and only demand a sip of water once a week or so. I’ve been delighted by the tiny leaves emerging, so much so I had forgotten the whole point was to harvest it. They’d simply become part of the house plant fam that lives in my living room.
Growing wasabi, particularly inside, is a year-long investment. You can buy plants online, but I’m lucky enough to have stumbled upon them at my local nursery. It will take at least a year for the plants to get large enough to harvest, at which point you’ll split them, take what you need, and replant what you’re not using.
While instructions for hydroponic setups are all over the web, all I used was some well-draining potting soil in a 12-inch self-watering planter. The “self-watering” part means that the soil can draw up its own water from the base, which keeps water in a receptacle, so the soil only takes as much as it needs.
I put the pots on the coffee table away from the direct sun that streams through the windows. I water them when the leaves are a little droopy, and once every month, I give them the slightest amount of fertilizer; it turns out wasabi root doesn’t require it as much as my other houseplants. My living room is usually within the recommended range 50-70℉. Wasabi does not do well over 80 degrees, but neither do I, so the AC keeps us a frosty 78 even on the worst days.
Outside, it’s easy to tell when the root is ready for harvest. The root emerges from the top of the soil, and you have a healthy, dense amount of leaves. Inside, where your plant is going to be a little less resplendent, you’ll just have to check by feeling the top of the root after a year or two, and ensuring it’s at least an inch in diameter.
Everything you need to grow and grate your own wasabi:
One of my plants was definitely a little ahead of the others, so I dusted off the top of the root and found it was about the size as the roots I’ve purchased in stores. Admittedly, I was a little sorry to see it go.
But not that sorry.
Preparing wasabi root
Once you’ve harvested your root, you’ll see there are three parts to it: the root itself, which will have offshoots growing from it, the stems, and the leaves at the end of the stems. If you’re going to try to replant it, divide the plant vertically, straight through the root itself. Keep part of it, replant the rest.
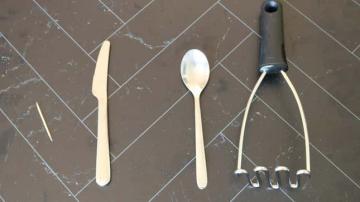
Now, wash everything, the stems, leaves and root. Cut the stems off the root, and put them aside. To prepare the root itself, you just peel it, exposing the flesh. Then you’re going to grate it. Wasabi paste is at its peak ten minutes after grating, so time it appropriately. There are wasabi graters, called oroshigane, which, like ginger graters, separate the stringiness from the pulp, resulting in a paste.
Dry the leaves and the stems and rough chop them into ¼-inch pieces, a large dice, if you will. Put them in a jar, bag or container, and cover them in soy sauce. This mixture can sit on the counter while it marinates; I generally leave it in there overnight.
Drain the leaves and stems, but save the soy sauce, which will be a little spicy and extra delicious. Take your grated wasabi root and mix it with the soy-soaked leaves and stems in equal parts. I take it one step further, and put the mixture on a cutting board and chop it all together to really mix it up well. Then the entire mixture is ready for eating. Wasabi doesn’t really have much of a shelf life once it’s been grated, so only make as much as you’ll eat in that sitting. If you’re anything like me, however, that will be quite a lot.